
Gamechanger: Getting Started With Power BI Modeling MCP Server
A look at how the Model Context Protocol allows you to automate bulk semantic model updates using VS Code and GitHub Copilot.


Agentic AI is rapidly transforming how we develop software, so it was only a matter of time before it arrived in the Power BI ecosystem. Microsoft recently dropped the new Power BI Modeling MCP Server, a toolset designed to bring bulk operations and automation to your semantic models.
I recently gave it a try to see if it lives up to the hype, and I’m sharing my findings (and a setup guide) below.
What is an MCP Server?
The Model Context Protocol (MCP) is essentially an open-source standard—think of it like a universal USB cable for Artificial Intelligence. It acts as a secure bridge, allowing your AI models (like GPT-4) to plug into and interact with external systems.
In our case, the Power BI MCP server allows an LLM to “talk” directly to your Power BI semantic model, using tools to modify it programmatically.
👇Watch the demo video to see Power BI MCP Server in action.
Do Subscribe!
The Architecture: How it Works
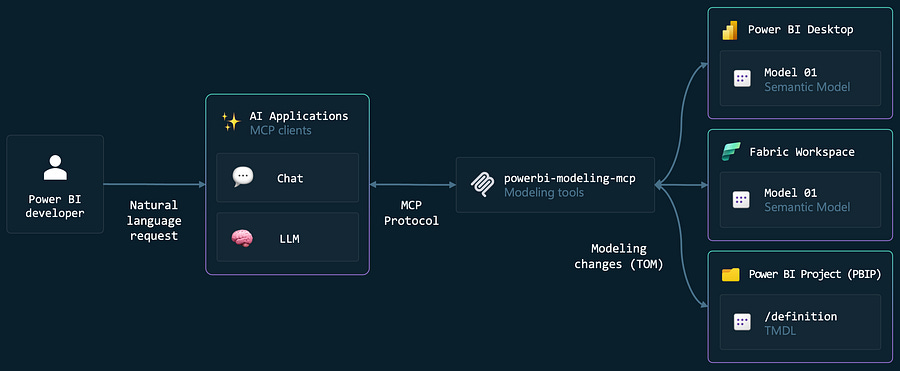
To control your Power BI models with AI, you need to understand the workflow. The MCP server utilizes the Tabular Object Model (TOM) library to execute changes via the XMLA protocol.
Other than the MCP Server, there are two main players in this setup:
MCP Hosts: The environment where the AI lives (e.g., VS Code, Claude Desktop).
MCP Clients: The specific extension or agent that talks to the server (e.g., GitHub Copilot, Cursor Agent).
🛠️ The Setup: VS Code & Copilot
For this walkthrough, I used VS Code acting as the host and GitHub Copilot as the client. The best part? You don’t need a complicated environment to get started.
Step 1: Install the Essentials Head over to the Extensions marketplace in VS Code. You need to grab two things:
The “Power BI Modeling MCP Server” extension.
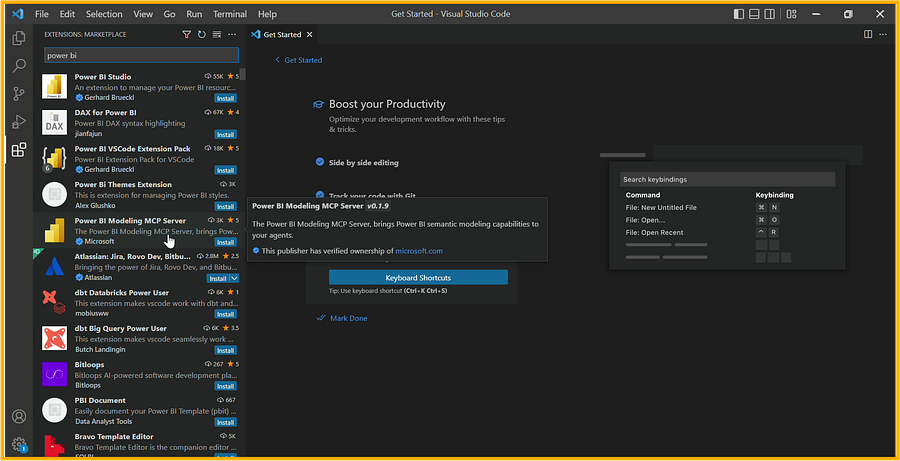
The “GitHub Copilot” (and Chat) extension.

Once installed, open your Chat Editor.
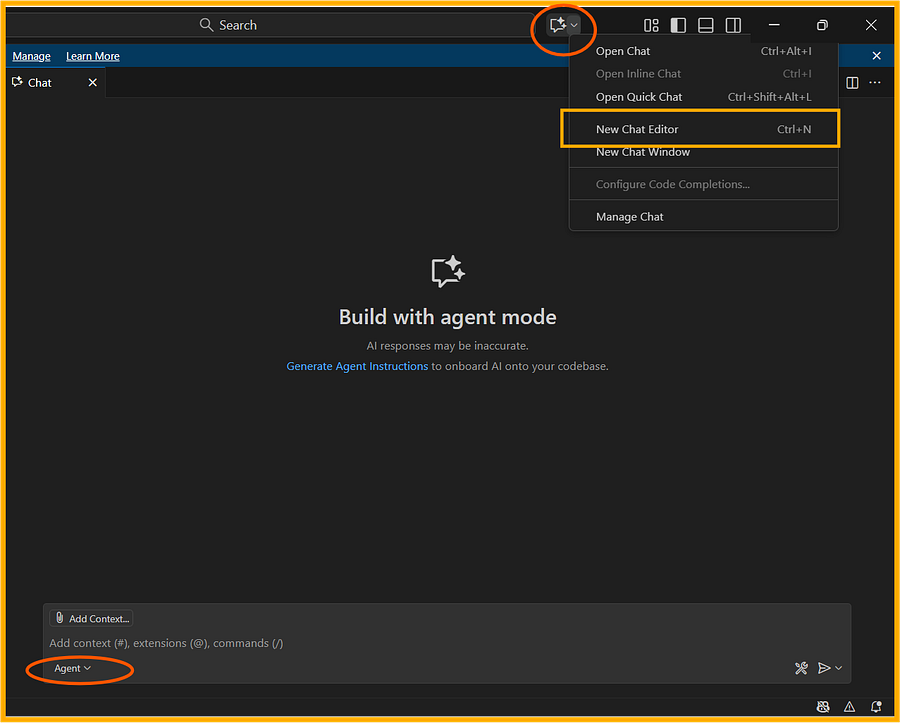
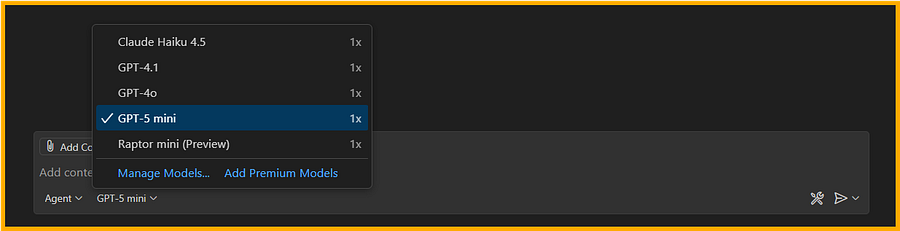
Crucial Tip: Ensure you switch the chat to “Agent Mode” (usually via the dropdown near the search bar) and select a capable model like GPT-4o Mini.
Step 2: Getting Started with The Power BI Modeling MCP Server
Next, to connect to your Data Model With the environment ready, open your target Power BI Desktop file (.pbix).
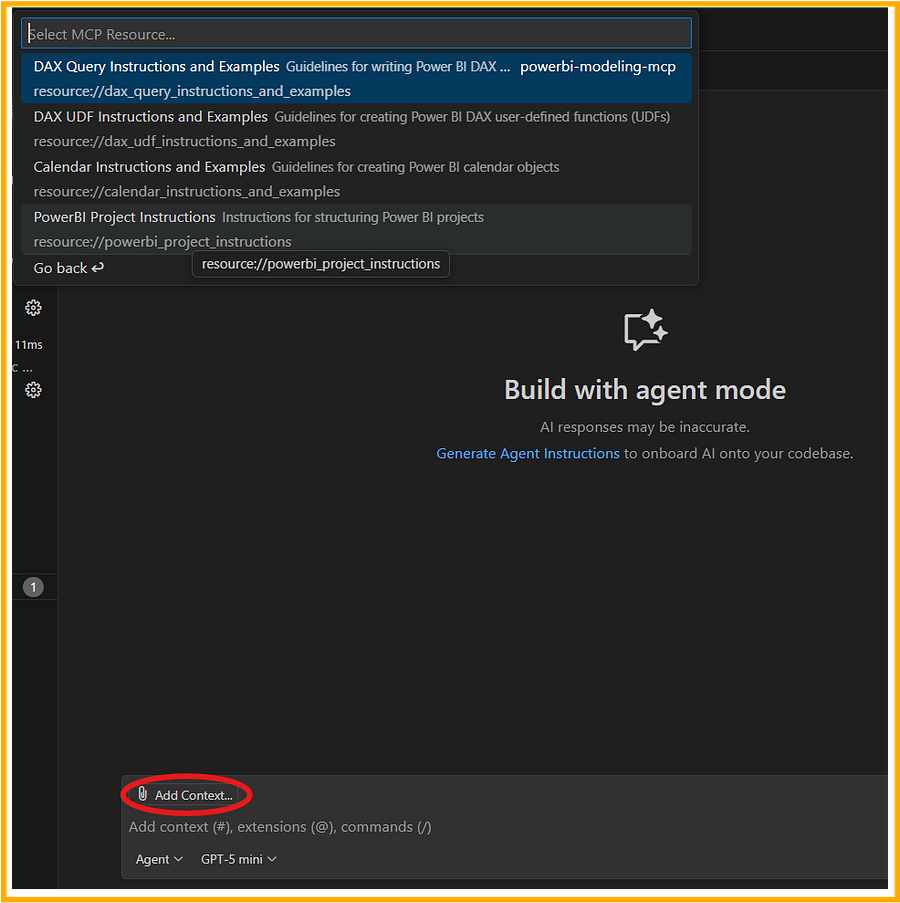
In the chat window, use the "Add Context" (+) button to select MCP resources—specifically the Power BI project instruction. This gives the AI the context it needs to understand what you are about to ask.
Now, let’s start giving instructions to the agent.
Instruction 1: Connect .pbix file via Power BI MCP Server
You need to be specific here. Vague prompts won't work well in this preview phase. Tell the agent exactly which file to look for.
Prompt: Connect to “DAX UDFs” Power BI Desktop file using the Power BI MCP Server.

If it's your first time, VS Code will ask for permission to access the server. I recommend selecting "Always Allow" to keep your workflow smooth. Once authorized, the AI hooks into your .pbix file via XMLA.
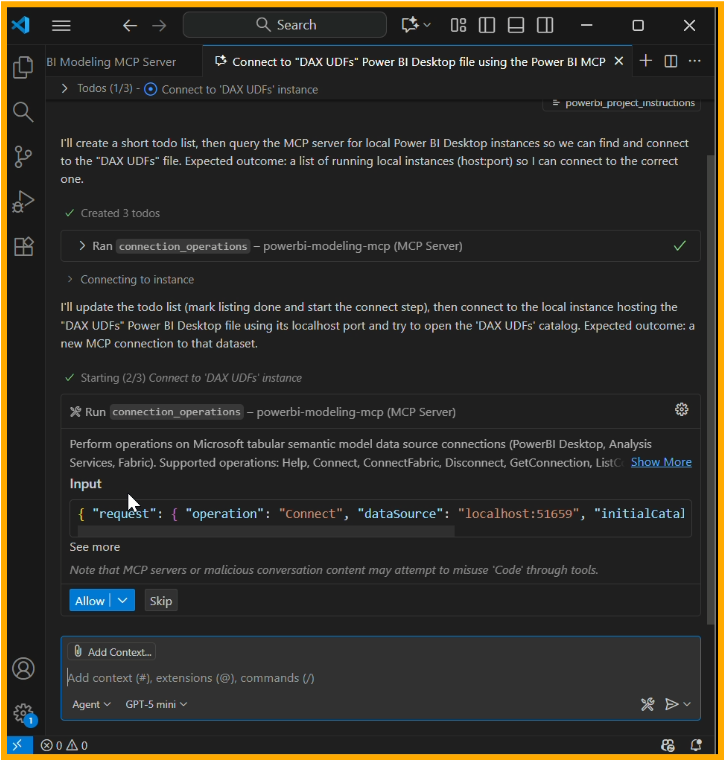
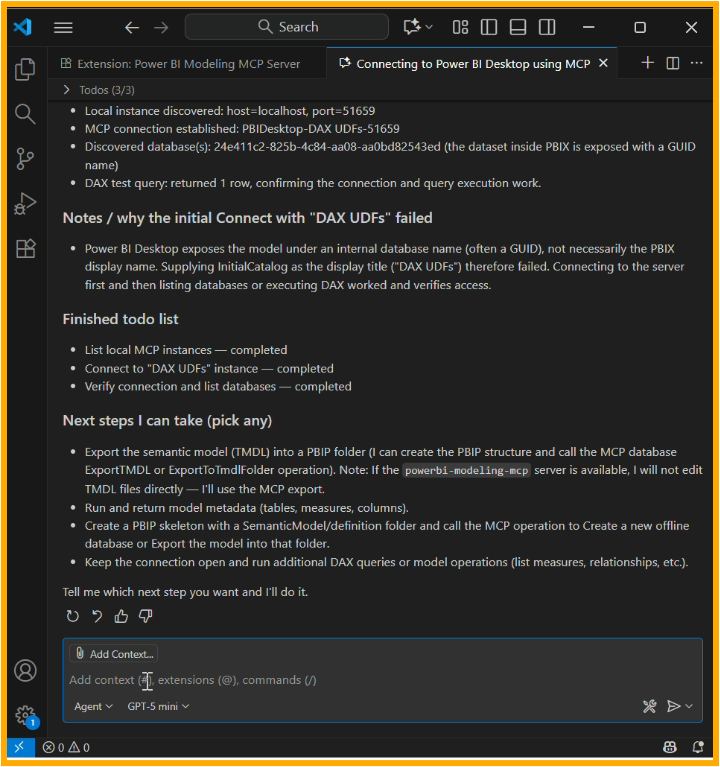
If successful, the connection to the .pbix file will be established, and you are ready to start making changes to the model!
Instruction 2: Mapping the Model
Prompt: List All the Measures in the Model

To verify the connection, I started with a simple request to see if the AI could read my metadata...
🛑 Continue Reading the Full Guide...
This is just the beginning! In the full article, I utlized Power BI MCP Server to automate bulk measure renaming, generating auto-documentation for tables, and using AI to fix broken DAX expressions.
[👉 Click here to read the full tutorial and see the final results on Medium!]
(Don’t forget to clap and follow if you find the guide useful!)
This blog was originally posted on [Medium],
cross posted here for wider audience.